Tuesday, April 29, 2014

Dream by wiosanka

Hello!
Sometimes life is not so easy and happy as we would like it to be... There is a tough time in ones life sometimes and I must admit that now it is me that is standing face to face with difficult decisions and hard time...
But one thing I know for sure. Everything in our lifes has sense. Everything that happens to us is for something. So if You feel sad, or You feel that everything is going wrong, take a deep breath, smile and... learn Your lesson... let things flow, learn Yourself to go with this flow...

And You'll see - everything is gonna be ok :-) Soon :-)


UmWow Studio supplies that I used:

Monday, April 28, 2014

Sweet Memories

Hello :) Anai here. I hope you have a nice and sunny monday :)

This time I'd like to show you my latest LO inspired by our April's Sketch.
I like to use small photos on my layouts, so I decided to keep photo small, but to fill the center of the page with papers contrasting with a background.


I wanted to use some of the older scrapbooking papers - few different collections but to add more light to the dark background I was choosing mostly delicate beige papers. i also used a photo from a very nice meeting I had some time ago with probably the most creative girls I know :)
It just felt good to preserve this memory.


I love all this small chipboards designed by DeeDee. You can use it in so many different projects. It's easy to layer them and add a lot of dimension to the page.


I felt very inspired by a sketch, so I decided to use a little bit of pink tangled threads :) I put it over a small amount of gel medium and then covered with a flair.


One of my favourite stencils is the Chevron Mask. It's elegant and funny at the same time :)
I actually used it here with a fake Glitter Snow :) It's a leftover of my christmas projects and it works perfectly as a texture paste ;)


And maybe you'd like to join us in April's challenge?
Here's our sketch:


UmWowStudio Supplies:
Chevron Mask
Hexagon Confetti
Layered Hearts
Gear Mash
Every Day Speech Bubbles
Love Notes Flair 

Friday, April 25, 2014

Guest CT Member Kasia

Today we've got a special treat brought by a Guest Creative Member Kasia


Kasia says "Hi! My name is Kasia Bogatko and I’m from Poland. I’ve been scrapbooking for 2011 and now I’m totally addicted. Media are my biggest love right now. I'm still learning them and I try to show their different faces in my artworks.
I love splashes, stains, texture… My favorite forms are LO, canvas, and recently even art-journal.
You can find me here: http://scrapowanieciri.blogspot.com "

And she has this lovely layout to share with us :


The base of her layout is Nature Walk from 7 Dots Studio (there's still some in the shop here), she's layered up bits n pieces from the collection, tags, words and more.


She's also used the Soar Tag set and the Feather Trio on her layout. 


Such a beautiful layout, let her know what you think by leaving a comment below! Thanks so much for joining us and sharing your stunning work, Kasia!

Thursday, April 24, 2014

Rainy Days by Manda

Hi there, it's Manda here today to share a new layout with you.

I wanted to scrap this instagram photo I took of the rain on the windscreen of the car because I loved the way it looked. I wanted the page to represent a rainy day so I started out with a sheet of light blue paper that had a watercolour effect and then I used the Line of Chevrons Mask and some modelling paste to create some texture. Next I took some grey acrylic paint and added some silver Pearl Ex.
Once my background was complete I used various papers and layered under the photo. I wanted to keep the grey theme so I took some Heidi Swapp Color Shine in Tinsel and painted onto my large Make Note Frame, because of the "shine" in the ink it created a metallic look to the chipboard.
I also did the same to a piece of the Layered Banners and Layered Arrows. I love the Life Is Good Flair but I felt it needed something else so I took a stamp and some Staz On ink and stamped it. I really like how it turned out and it was easy to get a good image because of the size and flatness of the flair. 
Finally I added some more stamping and embellishments as well as my title. My title was a bit too long to put across the bottom of the frame so instead of the word love I used a piece from my Heart Confetti and coloured it with black ink.

Thank you so much for stopping by!

Um Wow Studio Supplies:

Wednesday, April 23, 2014

fairy tales by Tusia Lech

Hello fellow scrappers :)

Today I would like to show you art-journal pages, which I have created in my friend's journal. I take part in two robin-round journal swaps and I have to say, that I love the idea lying behind it. As you can see, I have used lots of media :) I will try to tell you more about all supplies, when I will talk about each photo.


Below you can see gorgeous chipboard feather from UmWowStudio. I coloured it using green Glimmer mist and draw lines using black pen (and if I would tell you everything about this feather, there are also Caran D'Ache crayons).


On both sides of art-journal you can see cicada, which was created using Cicada Mask and brown Glimmer Mist.


Below you can see Cicada and background created using Crystal Mortar Paste, Izinks, Caran D'Ache crayons and white Pitt Artist Pen.


I have added some sewing and stamping with 7 Dots Studio stamps (Illumination collection).


And below you can see misting through a stencil - Circle Confetti.


I hope you liked it :)
Have a great day!
Tusia

UmWowStudio supplies:
Cicada Mask
Circle Confetti Mask

Monday, April 21, 2014

I'm Flying! I'm Flying!

Hello!

When my husband and I go on holidays, we have this tradition of taking photos of each other jumping as high as we can at random places along our travels. Well I have this photo of me in Iceland, jumping on an old lava field, catching some serious air! The whole photo is comical to me as I look ridiculous and my little daughter is off to the side staring at me like, "what in the world is she doing?"

I used the Comic Book Speech Bubbles because I felt it would go so well with the energy and the silliness of the photo!


And of course I love to use me some shimmer and shine on my UmWowStudio chipboards! I first covered the chippies with gesso then painted over them with metallic acrylic paint. I then added glitter to the area around the words.


The Chevron Mask and Diamond Confetti Mask were used all over the background for all the fun interest and movement they added.


Hope you got at least a little laugh out of this one! Have a great day!

Supplies:
UWS Comic Book Speech Bubbles
UWS Chevron Mask
UWS Diamond Confetti Mask

Tattered Angels Spray
Lumiere Acrylic Paint
Daler &Rowney Liquid Acrylic
Distress Stain
Two Berry Creative washi tape

Saturday, April 19, 2014

2 Projects by Aimee Maddern

Today we have 2 superb bits by one of the amazing girls from Paper Issues .. Aimee Maddern!


I’m Aimee a past owner of a scrapbook boutique who has a passion for paper & has way too much of it! I have always been a crafter. I officially started scrapping in 200ish. I’m a so Cal native who loves the sun, lattes, shopping, my boyfriend and 2 dogs. I work from home, which allows me to travel with my parents and their race car.


Hey there, I’m so excited to be here at UmWowStudio as a guest designer today.


Today I have two projects to share. First one is a layout I made using to different chipboard products, a background and confetti.


If you cant tell, I love to layer, and the Spooky Branch is perfect for just that! I added the Butterflies “flying” as if they just blossomed from caterpillars into the big wide open.


 Next I have a Pocket Scrap Page to share with you. I absolutely love the look of pocket scrapping. I haven’t quite got the hang of it but I like to play around. I thought the Ray Background was perfect to represent the sun rising. I love the simplicity of this page and the dramatic punch it gives to an album.

Thanks for stopping by the UmWowStudio blog today and checking out my projects.

Layout:
UmWowStudio Butterfly Confetti
UmWowStudio Spooky Branch
Basic Grey Spice Market 6x6 paper pad
We R Memory Keepers Happy Campers
Basic Grey for Studio Calico
Pretty Little Studio Neapolitan Label
Basic Grey Word Phrase
Kraft Tag
Date Roller Stamp
Tiny Attacher

Pocket Page:
UmWowStudio Ray Background
Studio Calico Handbook Page Protector
Tiny Attacher
Basic Grey Alphas
Machine stitching
4x6 photo

Friday, April 18, 2014

Just Breathe by Jen Matott

Today we have the super talented Jen Matott joining us! She's a super cool gal with some insane talent and I'm totally pumped to have her on the blog.


My name is Jennifer Matott and I'm a mixed media artist and scrapbooker from outside of Syracuse, NY. I have been scrapbooking and creating mixed media art for over 20 years with a Bachelor of Fine Arts and Masters of Science in Art Education.

Mixed media allows me to get creative with imagery and still create a 3D effect using a variety of media. My pages lean towards the dramatic and I love experimenting with papers and pushing the limits of what is traditionally done.

I'm an art educator in a public school and believes anyone can create meaningful Art! Teaching art is what inspires me and keeps me learning! My young students teach me so much!

Currently, I design for Faber-Castell Design Memory Craft and Scrapbooking From The Inside Out. I have been published in several paper and online magazines, including Scrap N’ Art, Scrapbooking and Beyond, Scrapbook Trends, and others.


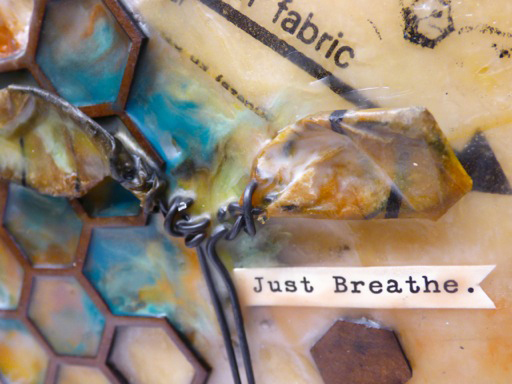
Hi UmWow fans... Jen Matott here as a guest CT for April! I'm so honored to be creating with these amazing products! I knew I wanted to keep the gorgeous brown color of these chipboard pieces! They are seriously WOW! So, I combined my love for encaustic and these fabulous shapes.


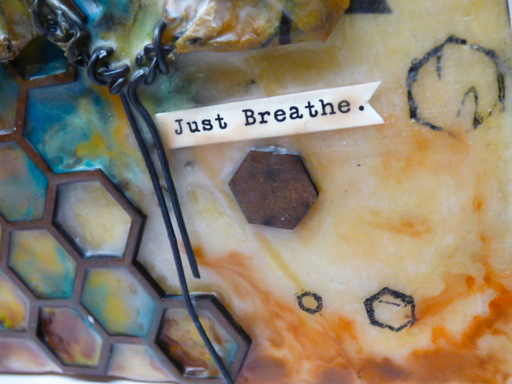
Encaustic is painting with melted wax. It's usually beeswax but can be other kinds of wax too. I use beeswax and damar resin colored by color sticks from Enkaustikos. I started with a wooden substrate with a deep set. I added a few layers of wax and then adhered the pattern paper onto the surface with a few more layers of wax brushed on.Then I added some colored wax and embedded the Hexagon Background piece and Hexagon Confetti!


More colored wax added in and around the honeycomb. This is the part I love most... embellishing!


I just keep adding color and use a heat gun to fuse the layers and allow the colors to swirl together! It also gets rid of most of the brushstrokes or imperfections!


Another fun technique is adding "drawn" details using an UmWow hexagon stencil and carbon paper or transfer paper in black. I place the carbon side down on the wax and place the stencil on top. I used a stylus to draw lines with the stencil and when you lift the paper off, you have black lines!


Finally, I made "wings" using wire, pattern paper and wax. They were embedding into the wax as well.


I love how this project came together and it was so easy to be inspired by these gorgeous shapes! I adored them and already have other encaustic projects in mind with other shapes! Thank you to UmWowStudio for inviting me to share my project today!


Supplies:
Hexagon Confetti Mask
Hexagon Confetti
Hexagon Background


Other Supplies:
Wood box
Sewing pattern paper
Wire
Enkaustikos Wax Medium
Enkaustikos Wax Snaps (Bone Black, Cadmium Red Vermillion, Cerulean Blue, Cobalt Teal Green, Titanium White, Antique Bronze Pearl, Super Gold Pearl,
Opal Calypso Green)
Enkaustikos Empty Tins
Carbon paper
Sticker: Cosmo Cricket

Thursday, April 17, 2014

Sweet Boy {Scrapbook Layout}

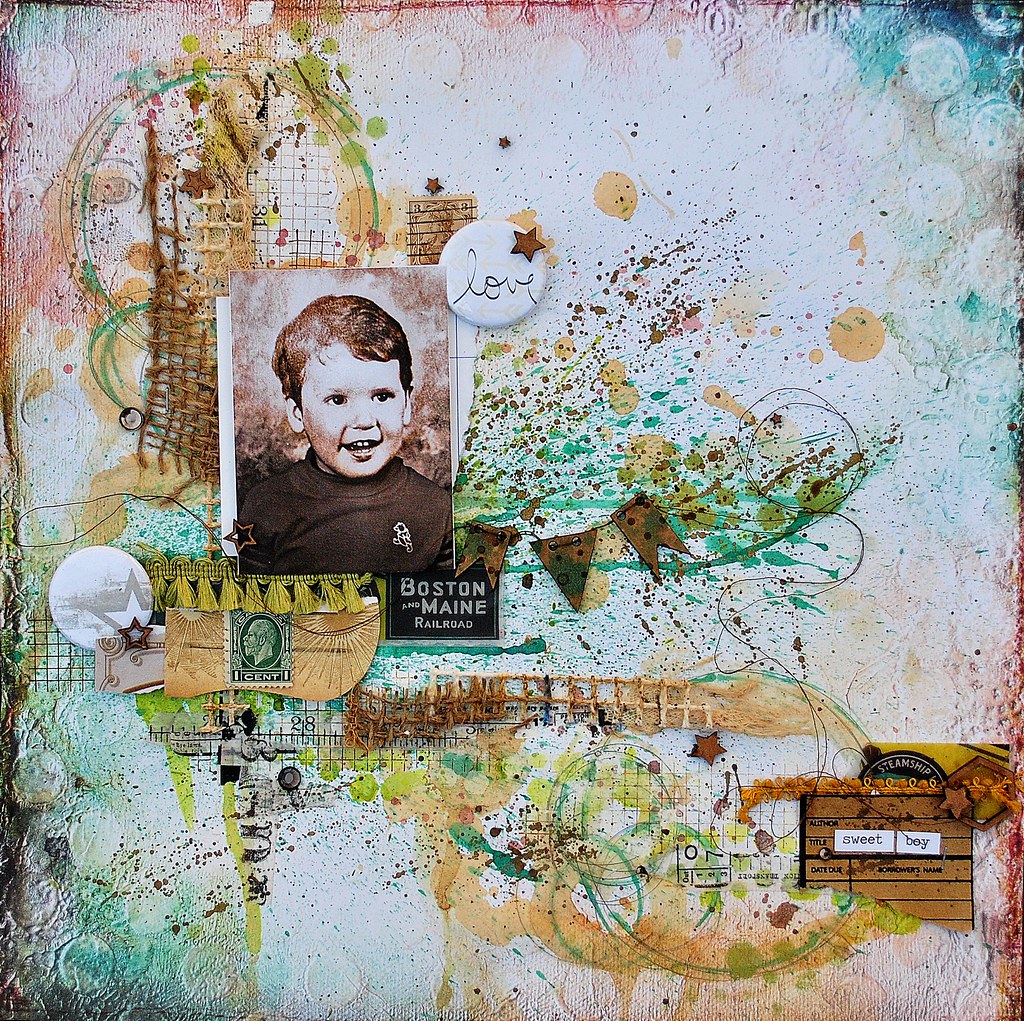
Sweet Boy, Full, UWS, ALLassiter Hello UmWowStudio fans, it's Amy here today, to share a layout I created using a favorite photo of my sweet husband when he was around three. This is the first photo I've scrapped using a little boy, as I have three daughters; so I started by choosing a fairly unisex color palette. Once I had created the background, using Lindy's Stamp Gang mists, tea stain, and paint,(I used the Hexagon Confetti and Checker Board masks in random areas throughout the page, using a green metallic paint); I layered on washi tape, stamping, and finally fibers (cheesecloth, latch hook rug fabric, burlap)...and of course the paper and photo layers.
love flair, sb, allassiter
When it came time to embellish, I used flair from  Life is Good  and Moon Shine.  and scattered gently across the page are pieces of Star Confetti, and a bit or two from the Layered Hexagons.
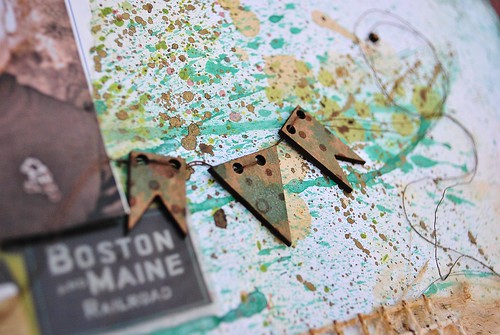
mini chip banner, sb, allassiter
Finally, I misted three pieces from the new and wonderful Banner Mash, and strung them with thread...easy peasy! I'm so excited with how this layout turned out, and I have it on display....the perfect way to share a sweet picture of a now very sweet man. :)

 Supply List:
UmWowStudio:
Chipboard-Banner Mash, Star Confetti, Layered Hexagons
Flair-Moon Shine, Life is Good
Masks-Hexagon Confetti, Checkerboard
Paper: 7 Dots Studio, 9th Wave
Transparency:Glitz Design
Journal Cards: Jenni Bowlin Studio
Stamps: Viva Las Vegastamps! (washi tape)
Mist: Lindy's Stamp Gang
Tissue Tape: Tim Holtz
Paint: Plaid, Viva Decor, LuminArte
Trim: The Paper Studio
Ink:Tsukineko
Other: Burlap, Latch Hook Rug fabric, cheesecloth, thread (coates twig), vintage stamps, tea for stain

Wednesday, April 16, 2014

Be your own kind of beautiful!

Hello and Happy Wednesday!

Tina here today with another Art Journal page, featuring the wonderful, Layered Raindrop Chip.  I thought this Chip resembled flower petals, so I created a page using them as a floral design element.


To create texture on each 'petal' I first applied a liberal coating of gesso, then Luminarte Silks Paint and contrasting embossing powder.  Once the chips were adhered on my page, I then applied several colors of Lindy's Magicals (a powdered mica) to each petal for more color and dimension. 


For the centers of my flowers, I applied to same technique (of coloring my petals above) to Square Confetti and layered them in the center of each flower.


I also used several Raindrops as leaves for my flowers, simply colored in a leaf color.


I hope you enjoyed my art journal page today.  Have a wonderful week and thank you for stopping by!

Tina